Hi Friends,
Here I'm going to show how to deploy React Apps on Heroku from GitHub.
Nowadays we have more platforms to host our apps. Some of the platforms are
Heroku
Netlify
AWS
Firebase
GitHub and etc
Heroku is a container-based cloud Platform as a Service (PaaS). It's quite simple and fast to deploy and manage.
First, we have to install the create-react-app and open the account in Heroku.

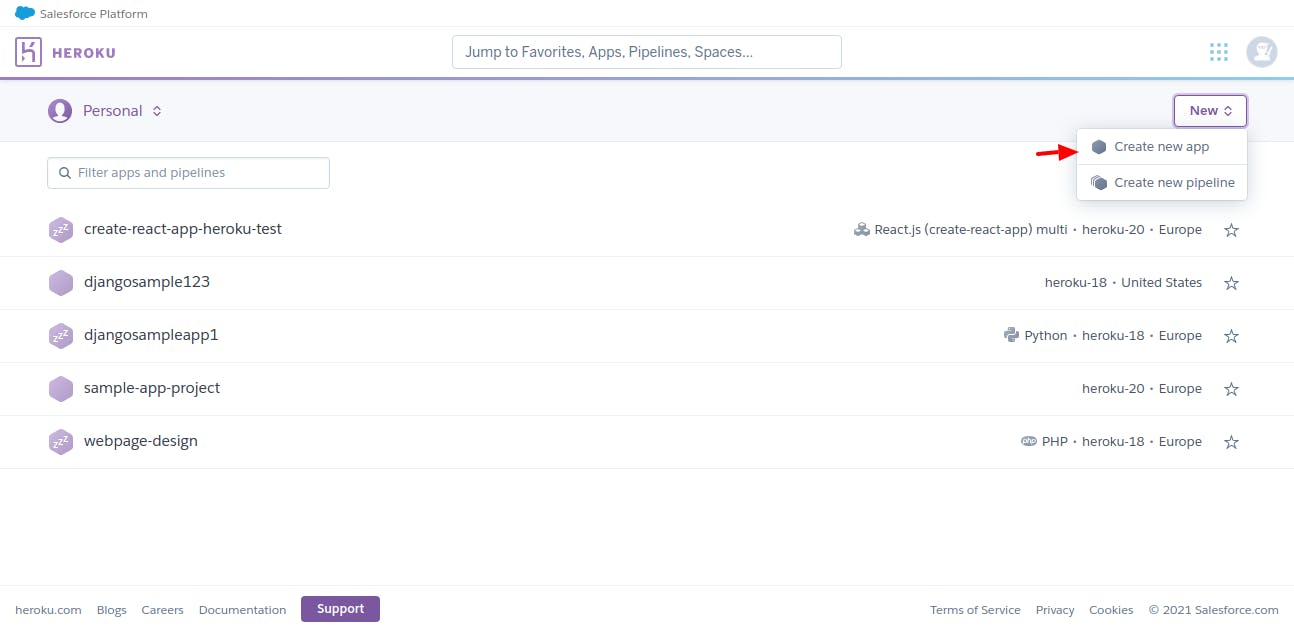
After Login, we can see our Heroku dashboard with our project List in dashboard.heroku.com/apps.
Select New -> Create new app, to create a new app and host it.
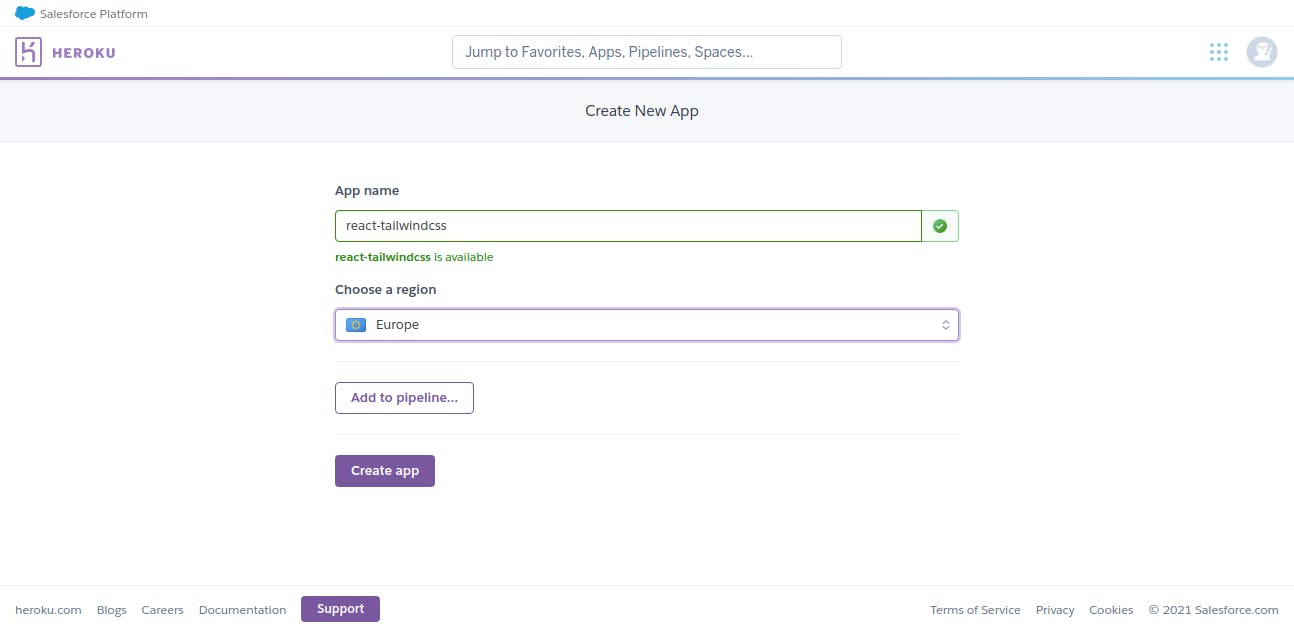
Give the App name, select region, and click a Create app. Here react-tailwindcss added as App name.
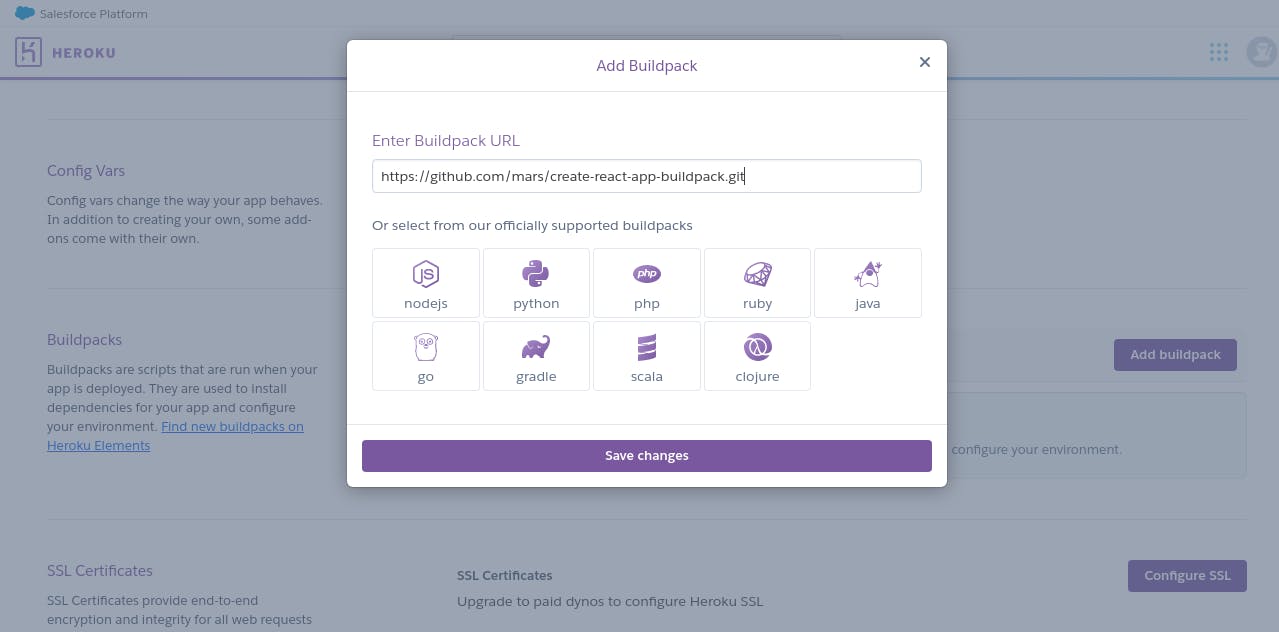
Add Buildpacks
Once App created, we have to add Buildpacks in Settings -> Buildpacks -> Add Buildpacks.
Here I'm going to add Buildpack as github.com/mars/create-react-app-buildpack
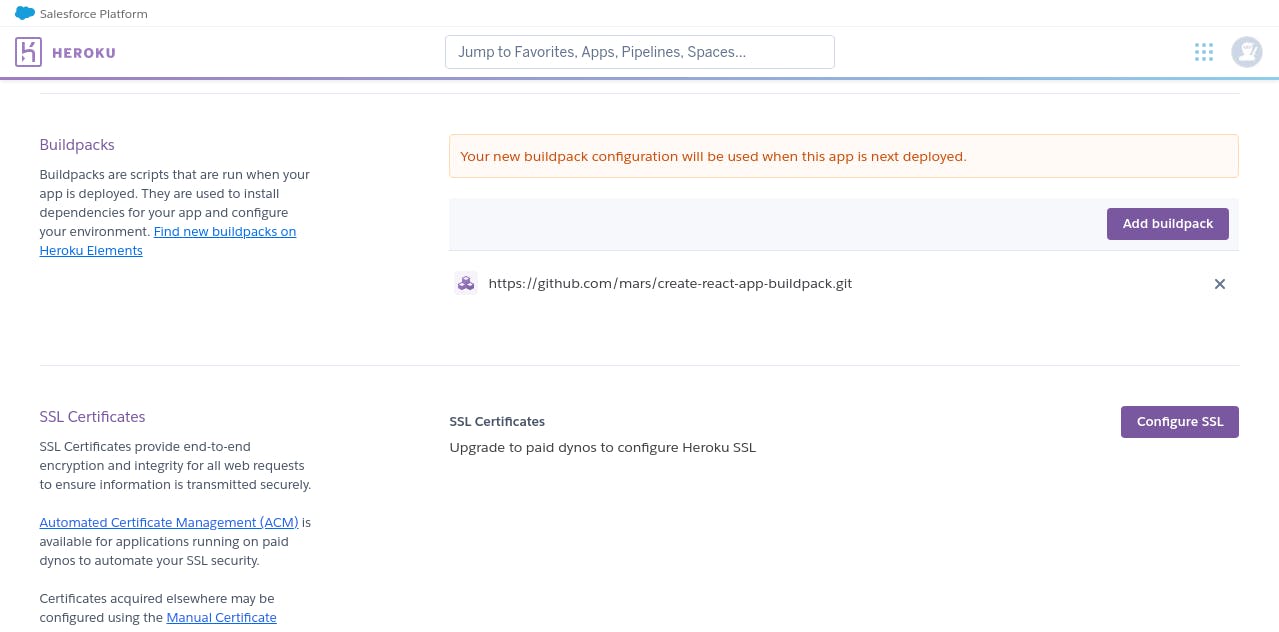
Finally, we have added Buildpack.
Set up Environment Variables
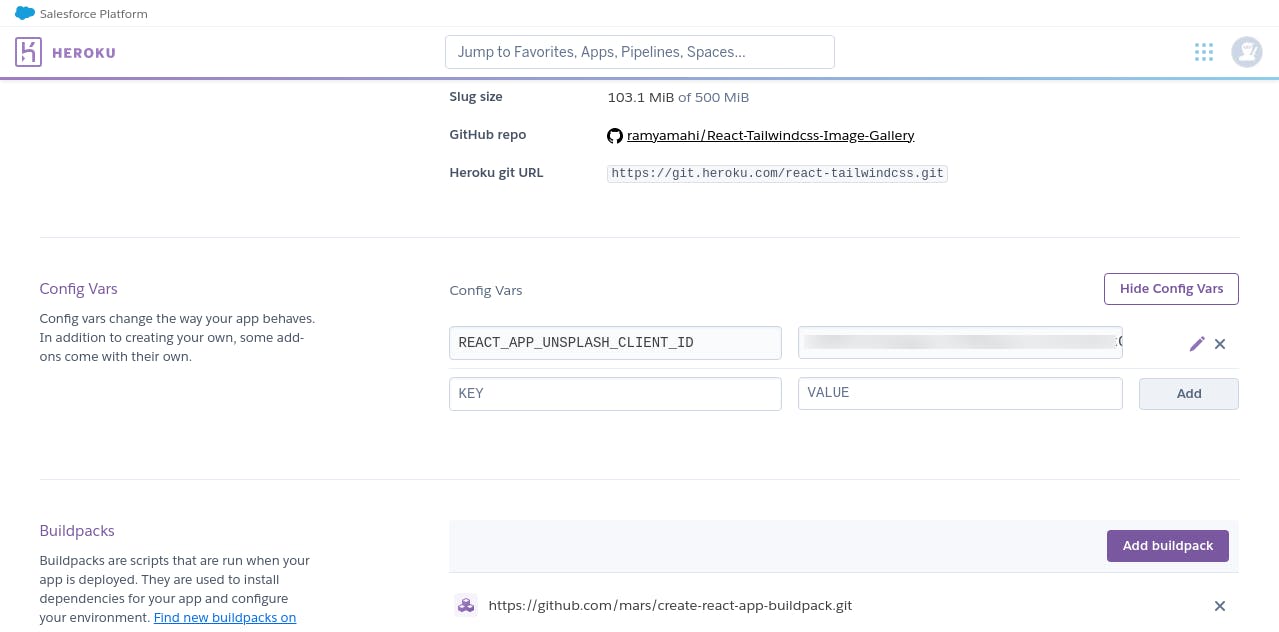
In my react app, I configured the Environment variable as client ID in .env file. If you have any API keys, secret keys or tokens, you have to add that in Heroku Config Vars.
Goto Settings -> Config Vars-> Reveal Config Vars, add your Key and Value
Deploy the App
In Heroku, we can deploy our apps by 3 methods
- Heroku Git
- GitHub
- Container Registry
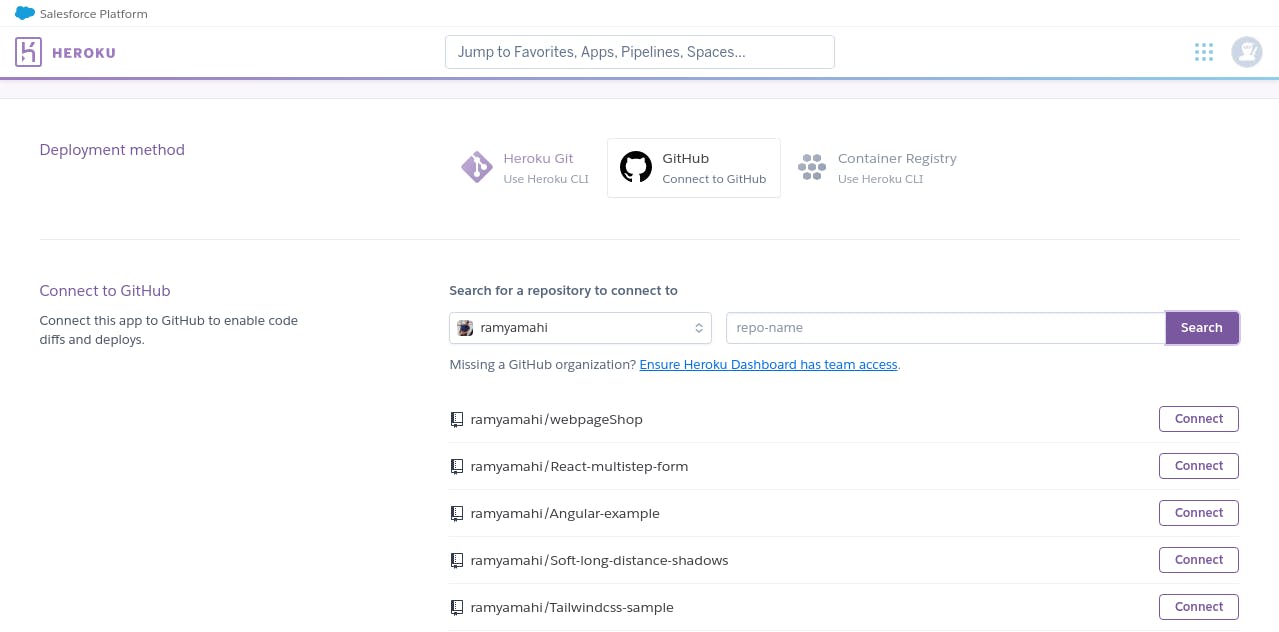
Here integrate the app's repo from GitHub. Select Deploy -> Deployment method -> GitHub.
So I have already pushed my project in Github(github.com/ramyamahi/React-Tailwindcss-Imag..). Now search this Github repository and Connect it from Heroku.

App connected to Github! What Next?
Yeah, Deploy the react-tailwindcss app by selecting Deploy Branch
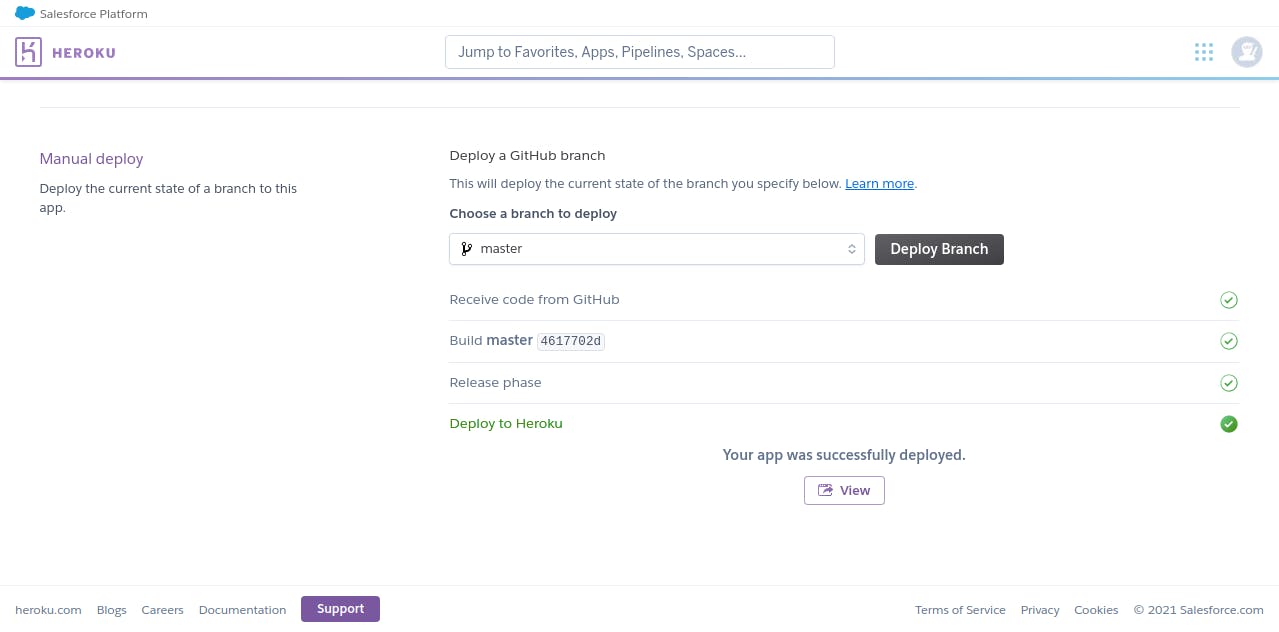
Now the Build succeeded and the app was deployed succeessful!! You will get the domain at Settings -> Domains.
Finally, our React Tailwindcss Image Gallery app deployed on https://react-tailwindcss.herokuapp.com/

Happy Learning!!!
